
HOW TO…
Replace My Stove Fire Brick.
Replacing the firebricks in your wood stove is an essential maintenance task that helps maintain the stove's efficiency and safety. Over time, firebricks can crack or degrade due to the intense heat they endure. Here's a step-by-step guide on how to replace your wood stove firebricks.
Important: Please Read Before Continuing
Before You Begin
- Make sure the stove is completely cool.
- Use safety gloves to avoid injury where possible.
- Have your replacement fire brick ready.
Important Tips
Be aware of the order to re-install the fire brick back into the stove!!!
How to Replace Your Wood Stove Firebricks
What You’ll Need:
- Replacement firebricks (make sure they are the correct size for your stove model)
- Gloves (for safety)
- Screwdriver (if needed for door removal)
- Tongs or pliers (optional, for handling hot or tight bricks)
- Dust mask (optional, to avoid inhaling dust)
- Rope seal (if replacing a damaged seal)
Step-by-Step Instructions:
-
1. Allow the Stove to Cool
- Wait until the stove is completely cool before starting any work.
-
2. Remove the Stove Door (if needed)
- Depending on your model, you may need to remove the stove door to access the firebricks.
- Open the door and unscrew or remove it using a screwdriver if necessary.
Step-by-Step Guide for Removing Firebricks:
-
3a. Ensure the Stove is Cool
- Wait until the stove is completely cool to the touch before beginning any work. Firebricks will retain heat for a while after the stove is off, so give it time to cool down.
-
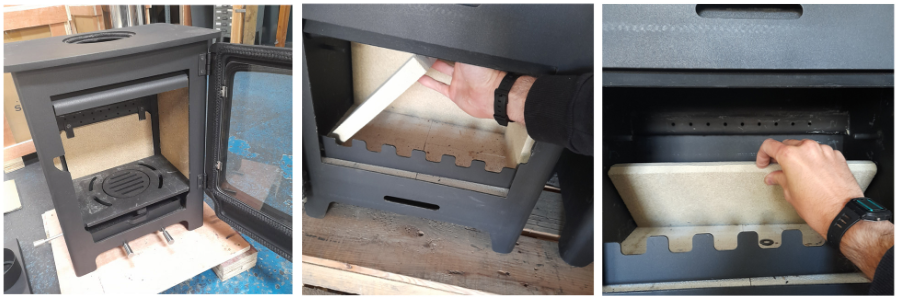
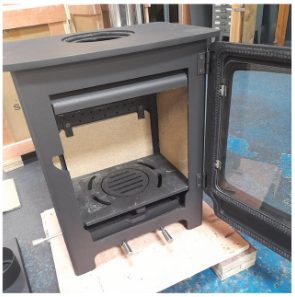
3b. Open the Stove Door
- Open the stove door fully to allow easy access to the firebrick area.
-
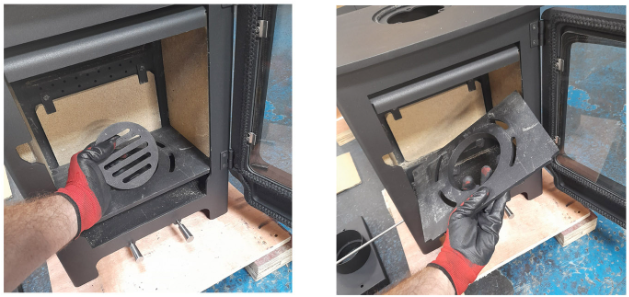
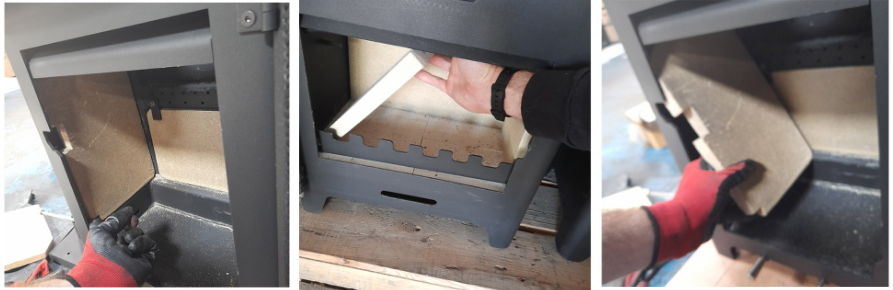
3c. Remove Any Loose Parts
- If there are Baffles Plates or Front Fire Bars inside the stove (or surrounding the firebricks), carefully remove them first. You may need to unscrew or lift them out.
-
3d. Assess the Position of the Firebricks
- Firebricks are often stacked or arranged in a specific pattern. Take note of how the firebricks are positioned before removal to ensure proper reinstallation.
- Look for any screws or fasteners that might be holding the firebricks in place (some stoves secure the bricks with metal clips).
-
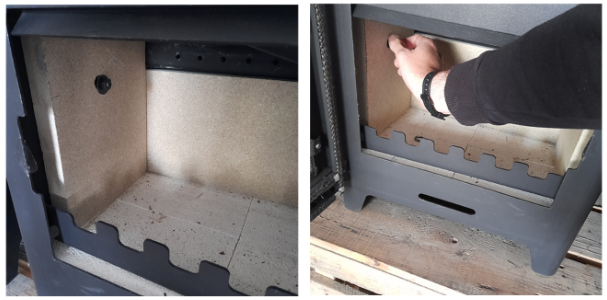
3e. Gently Lift the Firebricks
- Use your hands or pliers (if needed) to gently lift the firebricks out of place.
- Be gentle when removing the firebricks—pulling too hard or twisting them may cause the bricks to crack.
- Work from the top down, removing the upper firebricks first, then working your way down if the bricks are stacked.
-
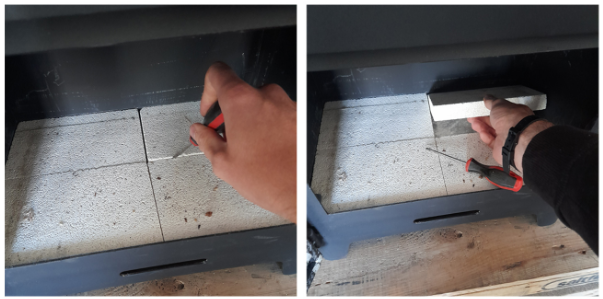
3f. Use a Tapping Motion (If Stubborn)
- If the firebricks are stuck or difficult to remove, tap them gently with a rubber mallet or a soft tool.
- Tap around the edges to loosen the brick without putting too much pressure on any one part.
-
3g. Check for Cracks in the Stove
- Once the bricks are out, inspect the interior of the stove for cracks or damage. Clean out any debris, soot, or ash before installing new bricks.
-
3h. Carefully Store the Bricks
- If you're planning to reuse the old bricks, carefully store them in a safe place until you're ready to reinstall them. Be cautious of any sharp edges that may have formed from cracks.
Extra Tips for Handling Firebricks:
- Never force the bricks out if they feel stuck—this could damage both the bricks and the stove. Tap gently to loosen.
- If the firebricks are in tight spots, use a pair of pliers or tongs to get a better grip.
- Clean the stove after removing the firebricks to ensure there’s no leftover ash or debris that could affect the new bricks.
-
4. Inspect the Firebrick Compartment
- Before installing the new firebricks, check the stove's interior for cracks or damage.
- Ensure the surrounding metal parts are not warped, as this may affect the fit of the new bricks.
-
5. Install the New Firebricks
- Place the new firebricks in the correct position within the stove.
- Stack the bricks carefully, ensuring they are aligned properly. Many stoves have specific patterns or arrangements for firebricks to optimize airflow and heat distribution.
- If necessary, adjust the placement of the firebricks until they fit snugly.
-
6. Check the Seal (If Applicable)
- If your stove has rope seals around the firebricks, inspect them for wear or damage.
- Replace the rope seal if needed using gasket glue. Make sure the seal creates a tight fit to prevent air leaks.
-
7. Reassemble the Stove
- Reinstall any parts you removed, such as the stove door or panels.
- Double-check that the firebricks are securely in place and that everything is properly aligned.
-
8. Test the Stove
- Once you’ve completed the replacement, light a small fire to test the stove.
- Check for proper airflow, and ensure that the firebrick replacement has not created any issues with the door closure or stove operation.
Important Tips:
- Ensure you’re using the correct firebricks for your stove model. Always consult the manufacturer's guidelines or manual to determine the right type and size.
- Don’t overtighten any screws when reassembling the door or stove parts to avoid cracking the new firebricks.
- Avoid using broken or chipped firebricks, as they can impact the stove’s performance and safety.
Need Assistance?
If you’re unsure about which firebricks to purchase or need help with installation, feel free to contact Stovebay.com at:
Email: sales@stovebay.com
Phone: 02866 342592